This is the second part of a tutorial series Im doing about normal mapping. You can find the part one here, but its not required to understand this part.
Baking normal maps
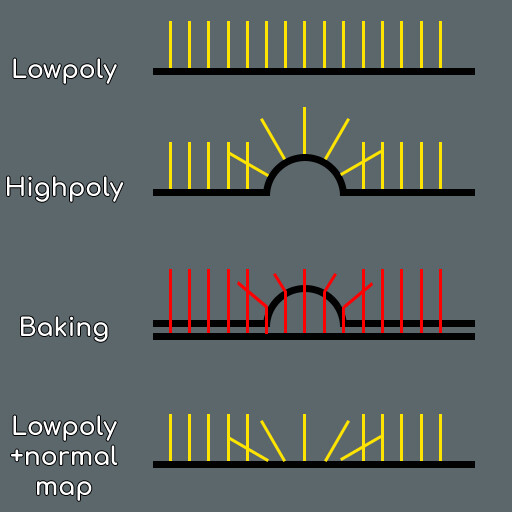
The general idea of baking a normal map is relatively simple: you have a lowpoly with UVs and a highpoly model; and you transfer the normal information from the highpoly to the lowpoly. This way, the lowpoly will bounce light as the highpoly would.
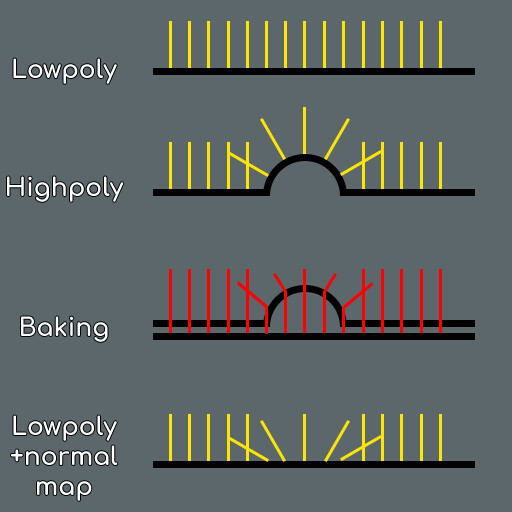
During this process, the baking program will basically cast rays from the lowpoly, following the vertex normals and searching for the higpoly. This is the most important aspect of normal mapping, and most problems people have when working with normal maps are related to this.
If you don´t control the vertex normals of your lowpoly model, you will lose control over your normal map.
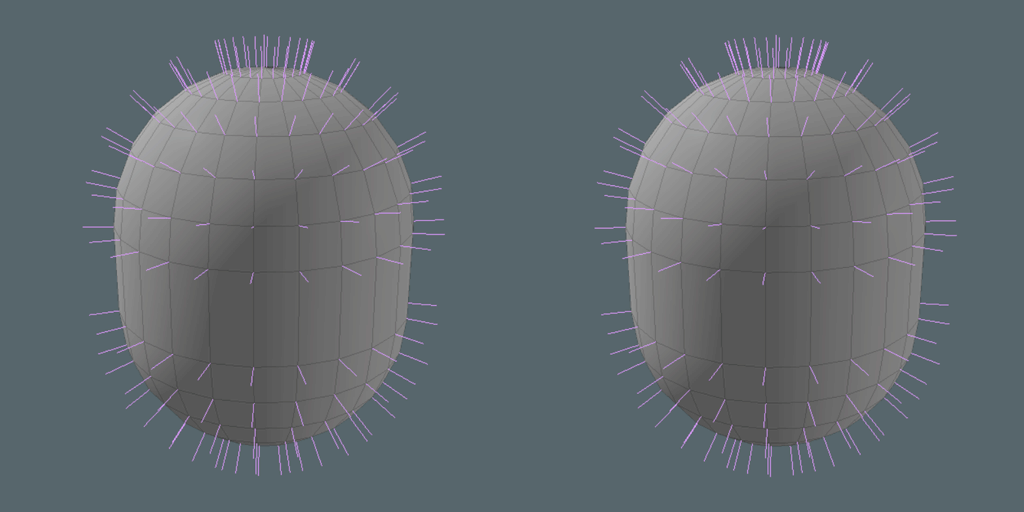
In order to control the smoothing of our lowpoly model, we can have split vertex normals (to create hard edges) or averaged vertex normals (to create soft edges).
Turns out that not all 3D programs use the same calculations to average the vertex normals. This means that your lowpoly will look different and have its vertex normals pointing at slightly different locations depending on your 3D program. This isn´t usually a big problem, since these deviations are very small, but can affect how your model looks; and these differences are exagerated when using normal maps, since your normal maps are modifying the lowpoly normals that are changing between applications.
The 3D industry is working to fix this problem, and a standard has recently appeared, called Mikk space. This is a method of calculating vertex normals that all 3D apps could use, so vertex normal don´t change between 3D programs. Keep in mind that not all 3d apps use it yet.
Another way to reduce this is effect is not to rely too much on normal maps when baking. Try to match your lowpoly more closely to the highpoly and use more hard edges on flat surfaces. This way, your normal map won't have to do all the work and these small deviations will be less noticeable.
The skewing problem
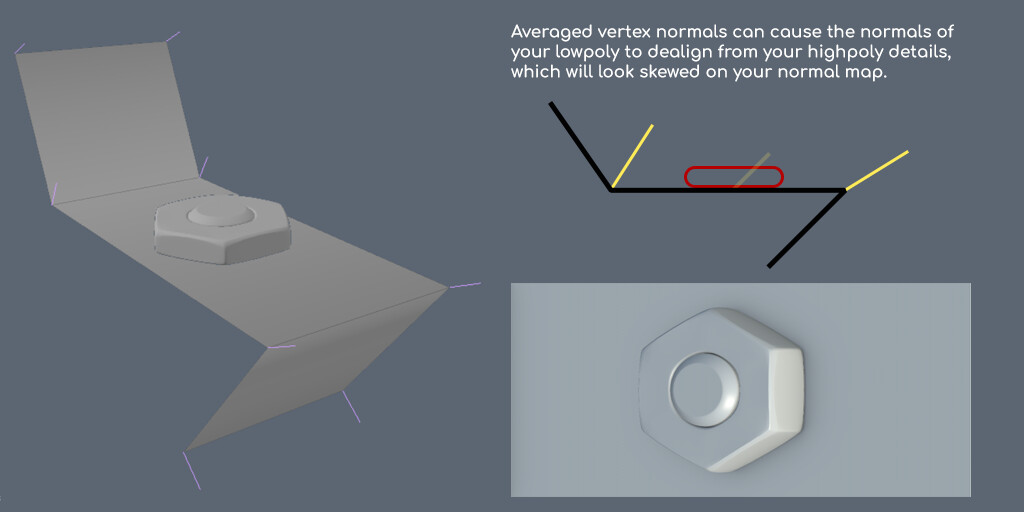
When the computer averages the normal direction of your lowpoly vertex normals, big changes in the angles of your surface can "skew" the lowpoly normals and they won't be perpendicular to the lowpoly surface.
Since the normal map baker uses the lowpoly normal directions when searching for the highpoly details, if these directions are skewed; they will appear skewed on the normal map:
This is a very common problem, and several solutions have been found. There isn't a best solution, it really depends on the geometry.
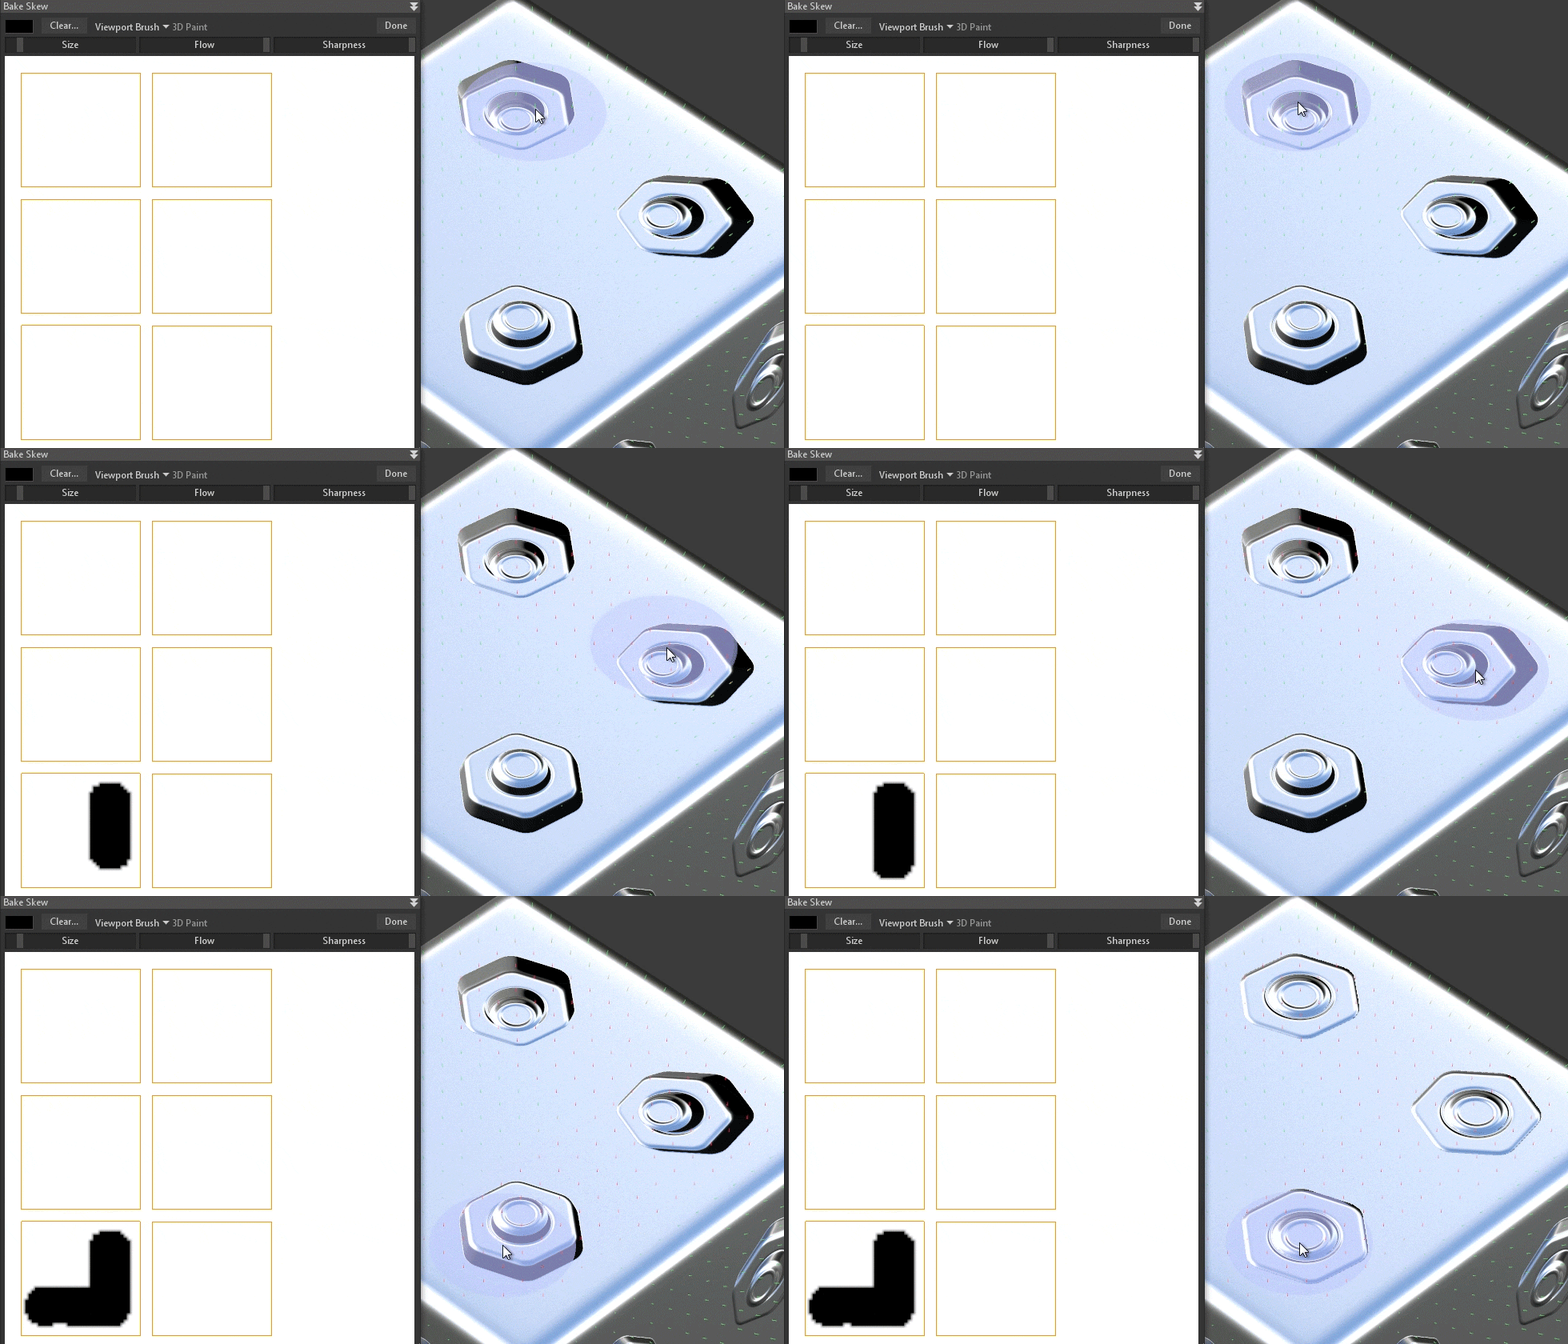
The first solution for the skewing problem is to rebake the problematic parts by modifying the lowpoly normals temporarily, so they are baked without skewing. Marmoset Toolbag has this option. Reddit user Tanagashi kindly explained to me that some programs such as xNormal can tesselate the lowpoly to add new vertices and make the normals perpendicular to the lowpoly surface, bake an object space normal map and then convert it to tangent space using the original lowpoly normals. Using this new normal map, the program can create masks to control where to use the original normal map and the one created from the tesselated lowpoly.
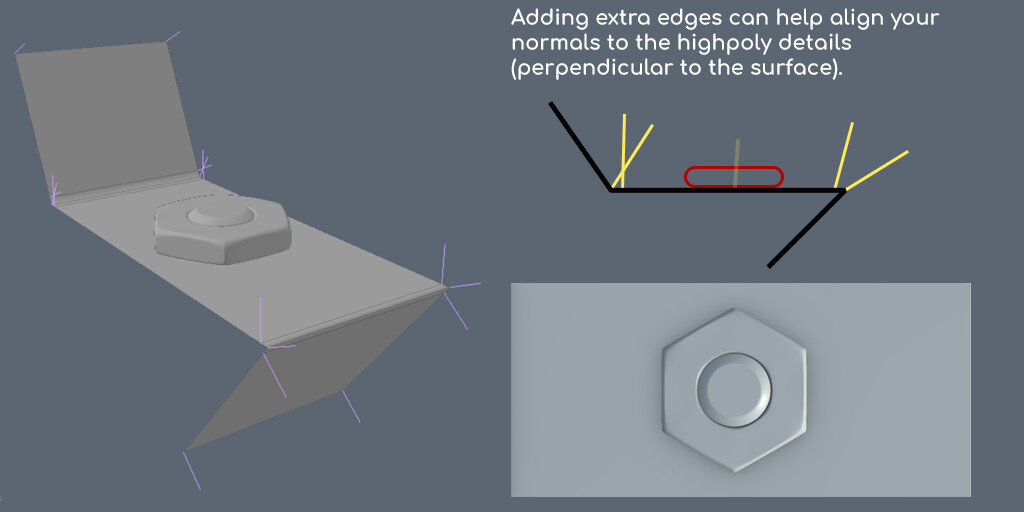
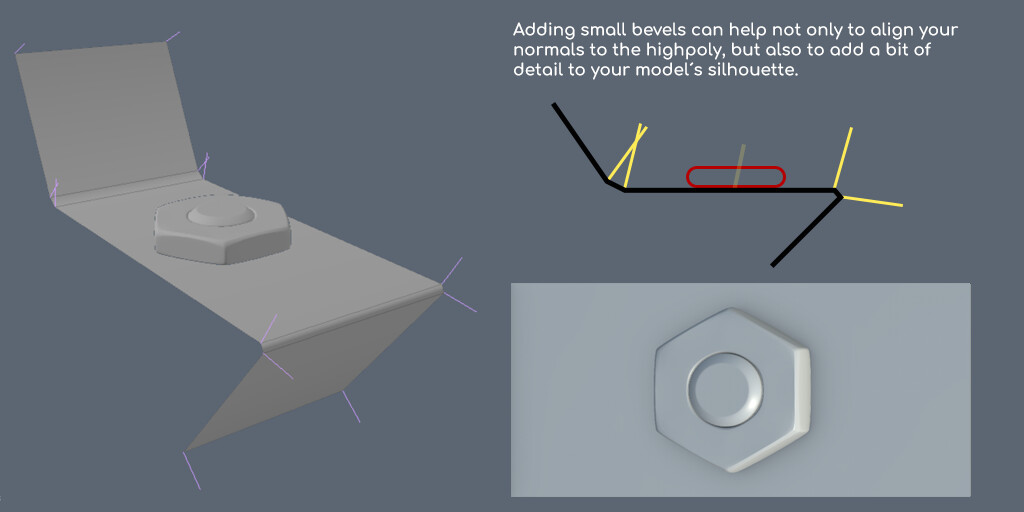
We can also reduce the skewing problem by adding vertices, as one 90º angle can be split into smaller degrees, making the second transition less skewed. This obviously increases your polycount and, since you are adding geometry, I reccomend you use this extra geometry to also add a more interesting silhouette to your model.
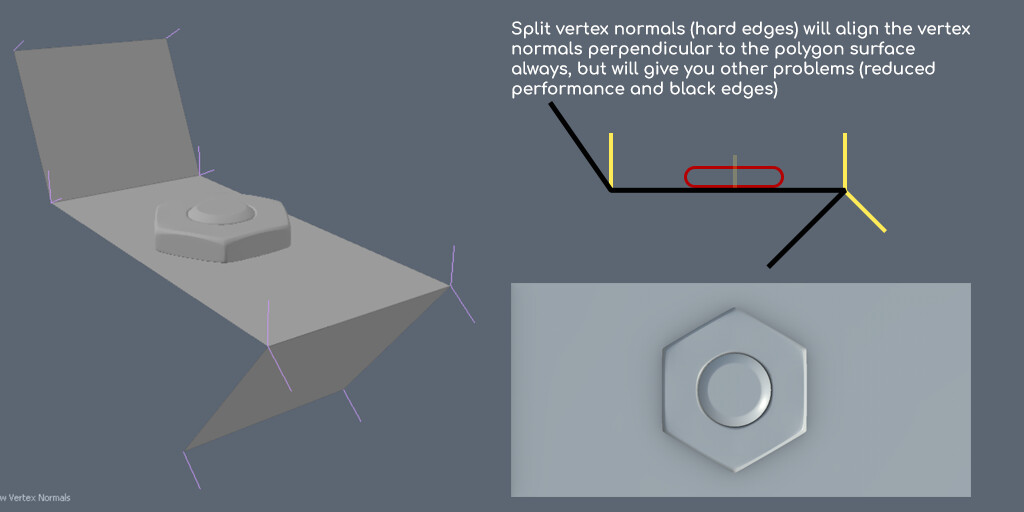
Another solution to the skewing problem is to split the averaged vertex normals (making the edge hard/use separate smoothing groups): this way, each vertex will have several normals, each one perpendicular to the lowpoly surface. Keep in mind that, when the 3D program has a split vertex normal; it actually creates a duplicate of the vertex, so this will increase your vertex count and slightly decrease performance. Additionally, hard edges could also give you a "black edge" problem, as we will see later.
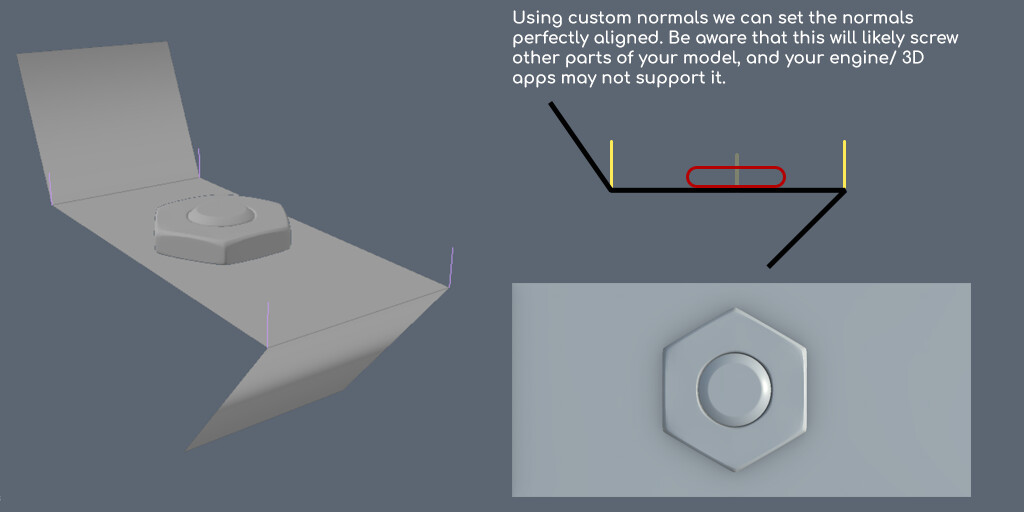
Finally, we can also reduce the skewing problemby modifying the normals of our models to bend the normals of our lowpoly so they are perpendicular to the highpoly details. Keep in mind that not all programs allow modified normals (Zbrush only has averaged normals, OBJ and older FBX files don't have custom normal information). There are basically 2 ways of modifying the normals:
-
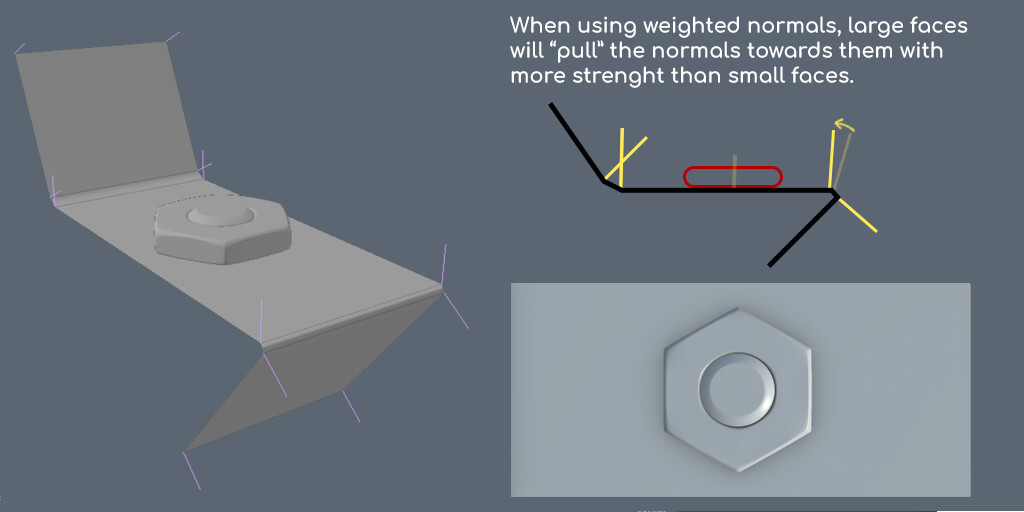
Weighted normals: this is an automatic method similar to the average vertex normals. The idea here is that when averaging the vertex normals not all faces will have the same strenght: larger faces will "pull" the vertex normals towards them with more strenght than smaller faces. This way, larger faces (which are usually more important) will have better detail projection. This works specially well with highpoly panels.

Custom normals: using tools from your 3D software, you can bend your lowpoly normals. This is a relatively new idea and there aren't many standarized tools for this. Keep in mind that bending the normals can create very weird unintended shading on other parts of your model, so this technique is usually combined with bevels. Some people call this technique "midpoly modelling".

Bake distance
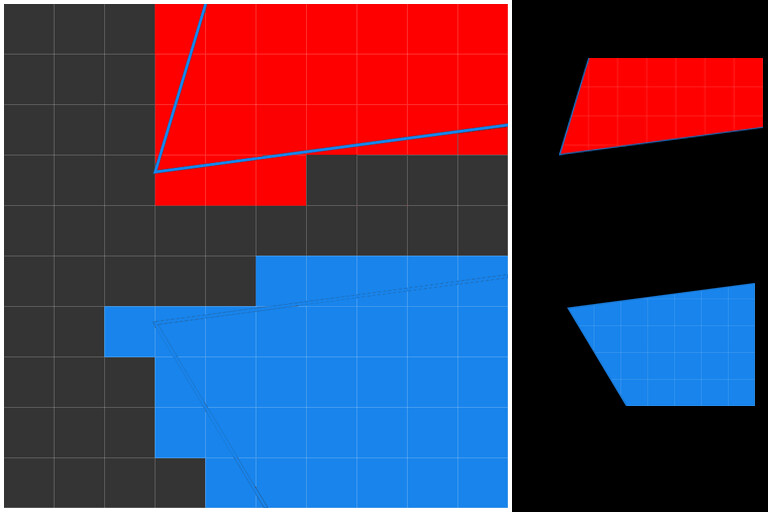
By default,the rays that are cast from the lowpoly surface travel a limited distance, to prevent the lowpoly from recieving normal information from far away parts of the highpoly. This distance is usually called "frontal/rear distance", as the rays can be casted towards the inside, outside of the model, or both. You can see this distance represented in red in the following image:
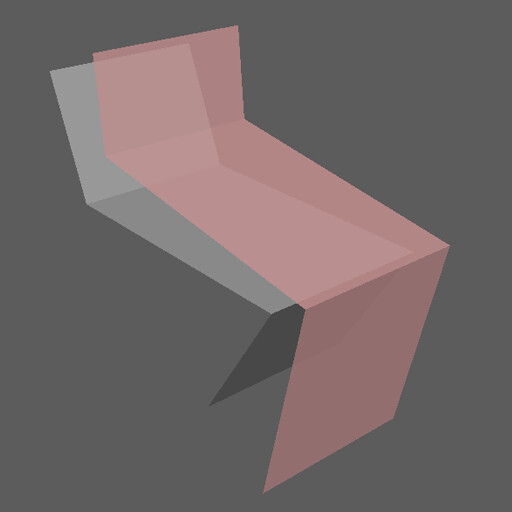
Some 3D apps (3ds Max for instance) also allow us to use a cage. A cage is a "copy" of our lowpoly model that we can modify so that it encapsulates the highpoly perfectly. And, in some cases (not all), also allow us to change the direction of the rays, without changing your original lowpoly vertex normals. This can help get the best baking extremes and avoid skews, but keep in mind that you are not baking using the normal direction of your vertex normals, but in the end you will use a normal map to modify the actual lowpoly normals, so the result could look strange.
Bake seams
Sometimes, when baking normal maps, we can see some seams:

These seams appear when we have hard edges in the middle of a UV island. Why is this happening?
UV values can be very precise: we can have a vertex placed exactly at the coordinates 0.0001203123 U, and 0.340404021 V. However, textures are much less precise: pixels are limited, and they can't be split (we can't have half a pixel).
So, a certain pixel might be exactly at 0.001 and a vertex might fall into 0.00134 inside the UV space. When considering the color of the pixel in the normal map, we have to choose a color that best represents the normal direction of the faces inside it, so we make an average:
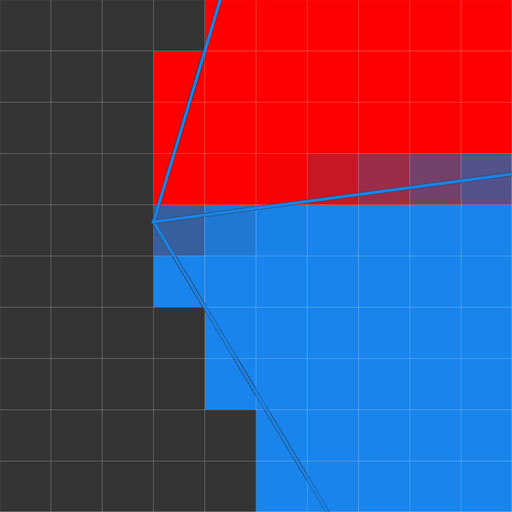
This is true for all baking processes, not just normal maps. However, this is much more noticeable with normal maps when we use hard edges. Normal maps indicate a direction and in the case of a hard edge, we have 2 faces looking in different directions, so they might have very different colors.

At the intersection between UV islands, the islands will compete to fill the pixels with their colors.This means that in the end, we will end up with pixels from island B modifying the colors of pixels from island A and vice-versa.
Islands separated by smooth edges look very similar on the normal map (because their normal directions are averaged), so a small difference in color is not very noticeable. However, islands separated by hard edges usually look very different on the normal map (because vertex normals are split and each face is looking in a different direction), and the difference can be noticeable, generating along the hard edges.
If we split the islands, they won't be competing for the pixel color: each island will be able to modify the entire pixel to fit its normal direction. This is why you should split apart the faces in the UVs when they are connected by a hard edge.
This video might also help you understand this process.
The rule of thumb is very simple: whenever you have a hard edge on your model, separate the faces connected by it in your UVs.
In conclusion:
Once I have my lowpoly model ready and adjusted to the highpoly model as close as possible, I start working on the smoothing before UVs.
I set my smoothing for the lowpoly (if its organic, I start with a completely smooth model, if its hard surface I start with a set angle smooth of 30-60º; and tweak the model smoothing until it looks good).
Once I have a set smoothing for the model, I work on the UVs, making sure that all hard edges are split into separate UV islands (to avoid edge seams).
If I have skewing errors, I add additional edges (usually bevels, to keep a more rounded silhouette). This works for most of my models, but I could also fix the skewing errors if I used Marmoset Toolbag for baking, or by using custom/weighted normals.
If there are projection errors, I modify the baking distance/ cage, modify the lopoly/highpoly so they are better fit for baking, or erase the normal maps on certain, really hard parts such as the tip of a cone.
Next up, I´ll be making a troubleshoothing guide for normal map baking and discuss some of the most common problems and solutions. If you are enjoying these tutorials, please comment so I have some feedback, even if its negative. I´m doing this so I can learn and improve, but a complete silence can be discouraging. Thank you for your time, and I hope you are enjoying these!
Part 1: What normal maps are and how they work.